Triggering Multiple Actions via Single Button
It is possible to trigger multiple actions with a single button. To do that:
- Launch the RealityExample, the project shipped with Reality Engine
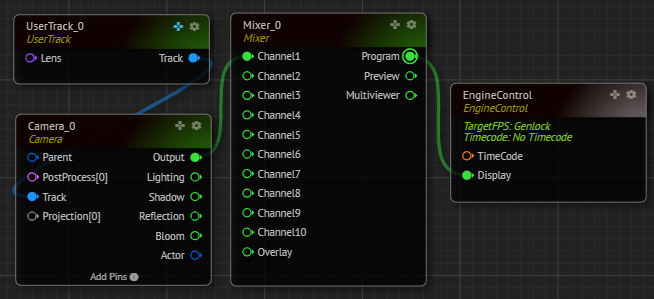
- Create the Node Tree as shown in the image above
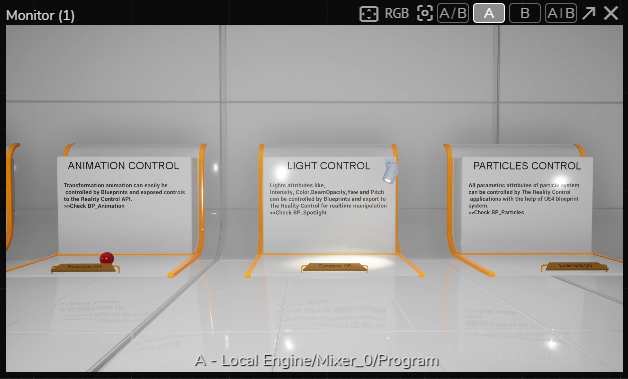
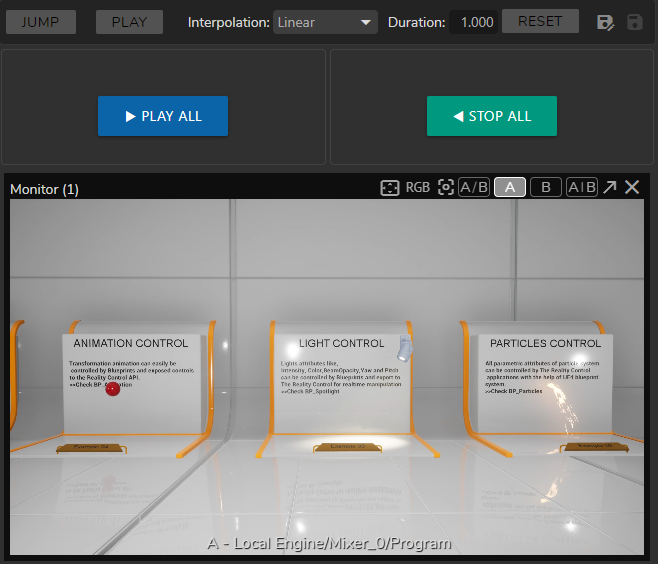
- Activate the Advanced Preview Monitor (APM) on the
Programoutput pin of theMixernode - Change your camera angle by adjusting the
UserTransformproperty values of theUserTracknode through the GamePad
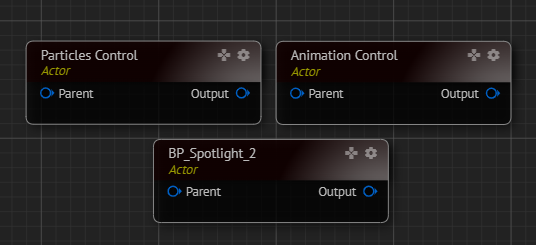
- You can optionally align the
Particle Control,Animation Control, andSpotlightfor better control, as shown above.
- Activate the Actions module and click on the
Createbutton, rename it if you like - Select the
Particle Controlnode, go to its Functions, right-click on thePlayproperty menu circle, select the Timeline - Select the
Animation Controlnode, go to its Functions, right-click on thePlayproperty menu circle, select the Timeline - Select the
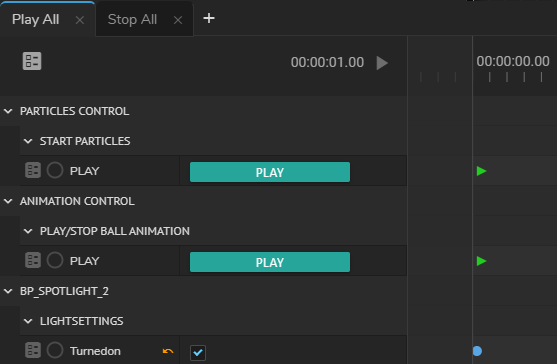
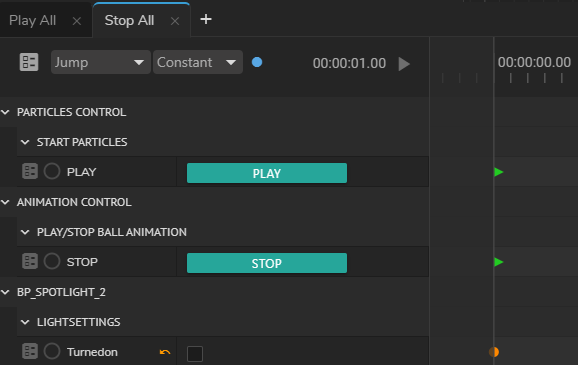
Spotlightnode, go to its Properties, right-click onTurnedonproperty menu circle, and select the Timeline - Go to the Actions module:
- Right-click on the
Playfunction menu circle of theStart Particlesproperty group, select the Add Keyframe option - Right-click on the
Playfunction menu circle of thePlay/Stop Ball Animationproperty group, select the Add Keyframe option - Right-click on the
Turnedonproperty menu circle of theLightsettingsproperty group, select the Add Keyframe option - Save the Action
The action above will trigger all Properties/Functions.
Now:
- Click on the
New Actionbutton, rename it if you like - Create a reverse version of the Action animation by repeating the same steps explained above except with two differences:
- Click on the
Turnedoncheckbox and deactivate it before you take it to the Action Timeline - Add the
Stopfunction ofAnimation Controlnode to the Timeline instead of thePlayfunction. - Save the Action
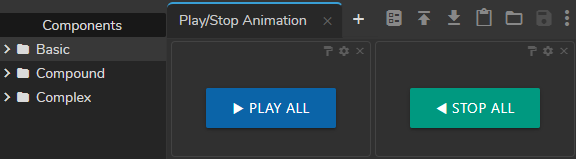
- Activate the Form Builder module, click on the
New Formbutton, rename it if you like - Drag and drop the Action Play buttons of the first and second animations to Form Area, and customize it if you like by clicking on the Field Setting button
- Save the template Form
- Activate the Playout module, select your template from Playout Template Form Area
- Click on the buttons and check the results via APM