R Drive Mapping
For working with Reality Suite, which needs communication between the connected machines in the Reality ecosystem, you must map a shared drive having enough HDD free space (We recommend a minimum of 100 GB).
This configuration is required only for the new users where Reality is being installed for the first time.
Sharing a Folder
- Create a folder "RealityWorkspace" in the drive having at least 100GB of free space.
- Go to that folder location.
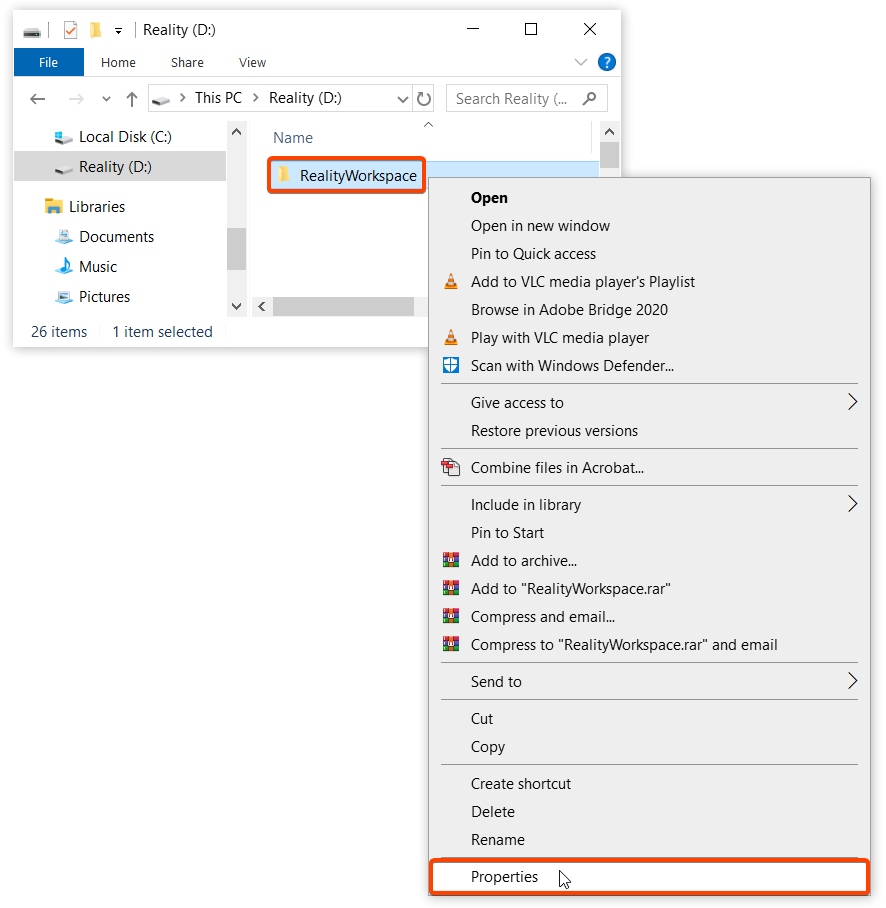
- Right-click on the folder "RealityWorkspace", select "Properties" from the menu.
A Properties dialog will open. Go to "Sharing" tab and click on "Advanced Sharing..." button.
Now click Check mark on "Share the folder" and click Permissions.
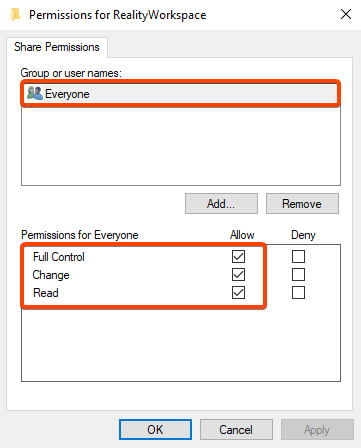
In the "Permissions for RealityWorkspace" window, select "Everyone" and under "Permissions for Everyone", Check all 3 options, Full Control, Change and Read and click OK.
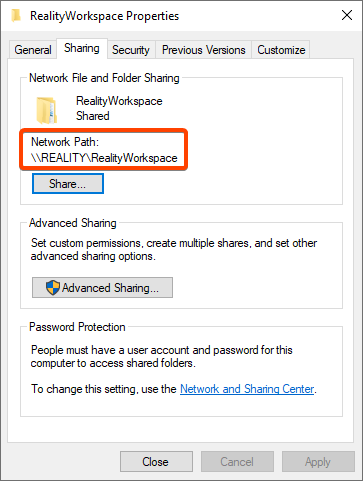
You should now be able to see the shared folder Network Path. Now close this window.
Now the folder is shared successfully and is ready to be mapped to the R drive.
Mapping a Folder to a Network Drive
Usually, in a production environment, you will have your Reality Processing Engine(s), design workstations, and control PC(s). To centralize your projects, you need to have a network share. This network share should be mapped as the “R:” drive.
- Press Windows + R key combination on your keyboard to invoke the “Run” dialog.
- Type the shared machine IP address or user name (followed by a double backslash) \\reality and click OK.
A dialog will open with the Network location containing the shared folder (Which is "RealityWorkspace").
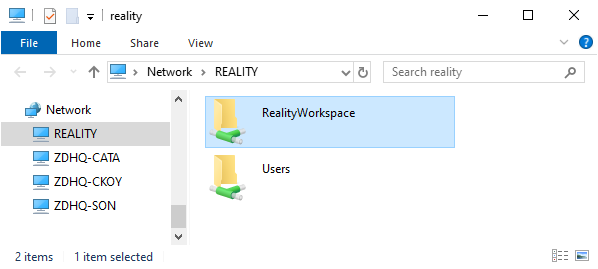
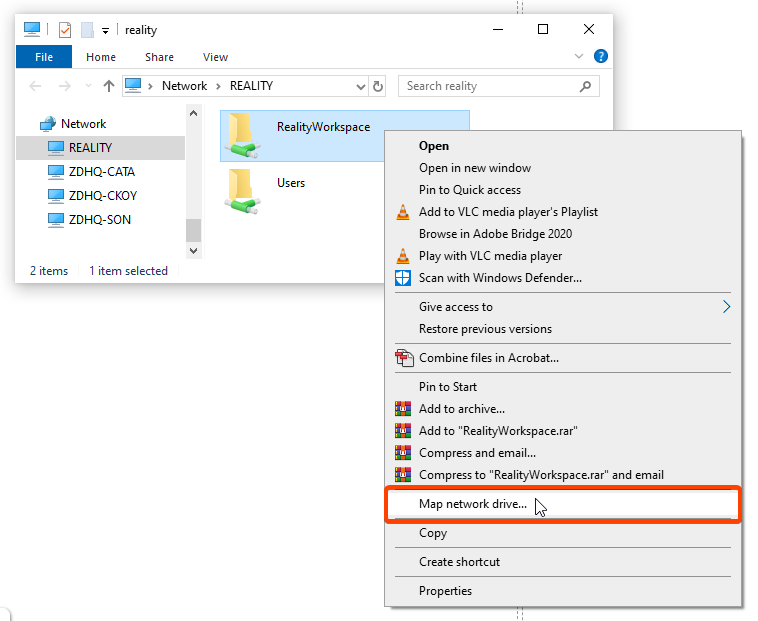
Right click on the shared folder "RealityWorkspace" and from the menu, select "Map network drive..."
Another window will open as shown below:
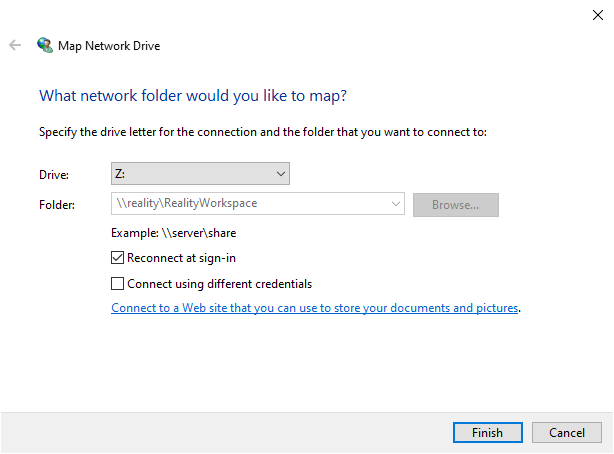
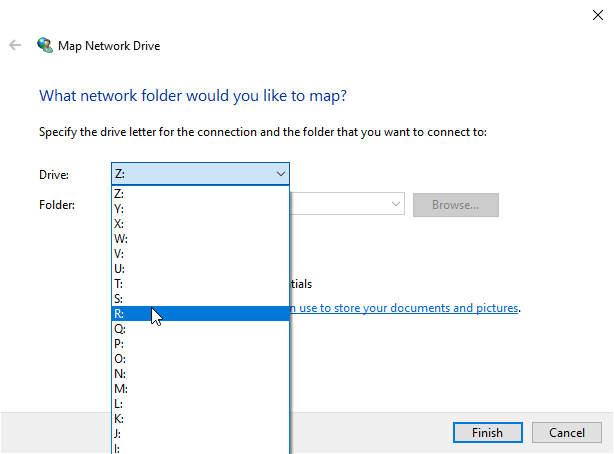
We will now map the Drive letter to R:
Choose the R: as the Drive letter**.**
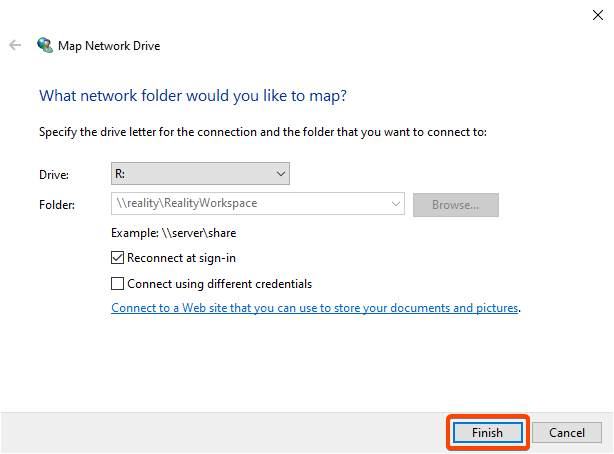
And click FINISH button.
Central Project Structure (Creating Reality associated folders)
You should now see network drive with Reality folder.
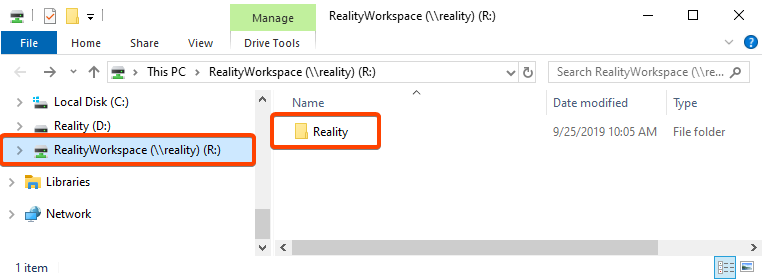
You should now manually create 6 folders under the R:\Reality folder as shown below:
- Assets
- Config
- Cooks
- Projects
- Sets
- Studios
Reality Folder should look like this:
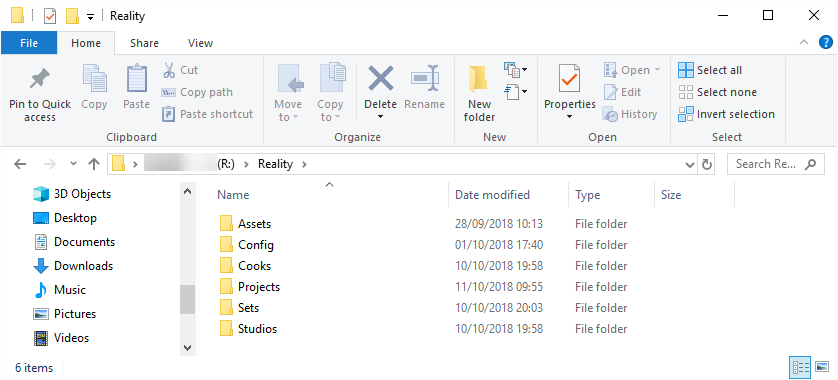
These folders will contain its respective files while working with Reality.
- Assets: It is recommended that you store live production assets here. Such as your logos, images or movie files.
- Config: This directory is used for storing configuration files for your facility setup.
- Cooks: This directory contains all the cooks of the projects that were cooked by Cook Server.
- Projects: This directory is where you should store your Unreal Projects, which will be used for virtual sets.
- Sets: This directory contains .rset file which is required by Action Builder to connect and create actions within this .rset file.
- Studios: Here is where the studio configurations are stored.
And now you can create all your projects, sets and save your configurations and assets under this drive.