Operating Actions
This section will guide you on operating the Actions by navigating and animating a Property/Function.
Before you begin:
- Activate the Nodegraph/Actions module
- Click on the
Actionsbutton on the bottom-right corner
Navigating
Reality Hub offers various methods to help you quickly navigate inside the Actions:
- Adding a Property to Timeline: To add a Property to the Timeline:
- Select a node
- Go to the Properties panel and find a property you want to animate/trigger/call.
- Left-click over the Node Property Menu circle and select the Timeline
- Expanding and Contracting Time Ruler: You can expand or contract the Action animation's duration by selecting the keyframe and changing its location inside the timeline. While changing the keyframe location, it snaps in every frame for accurate placement. To change the keyframe location with more accurate precision, you can expand the Time Ruler via the following steps:
- Hover your mouse over the Time Ruler
- Zoom in by rolling the mouse wheel forward
- Adding Keyframe: Left-clicking on the Node Property Menu circle inside the Timeline adds a keyframe to your Property/Function.
When you hover your mouse over a property/function, the Node Property Menu Circle turns white; this indicates that the property/function can be triggered/animated.
Property Timeline Indicator (the blue dot on the right side of the Node Property Menu Circle) indicates that the property/function is added to the Action Timeline.
- Get Value: Reads the current value of the property from the Engine.
- Removing Property: Left-click on a property or a Function inside the Action panel and select the Remove option deletes it.
- Action Timeline Reset: This button resets the position of the Action Timeline to frame zero.
- Playing: Plays your action animation.
Animating Property
Reality Hub’s approach to animating is unique and easy to understand. This section will be animating a UserTrack node’s UserTransform property.
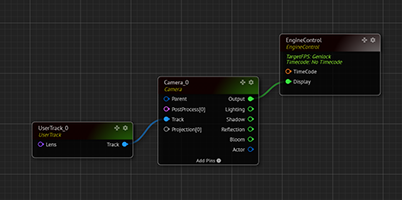
Add the following nodes to your Nodegraph View:
Cameranode from the UE Camera Node ClassUserTracknode from the Tracking Node Class
Make the following connections:
EngineControlnode’sDisplayinput pin toCameranode’sOutputpinCameranode’sTrackinput pin toUserTracknode’sTrackpin

Your RGRaph should look like the image above.
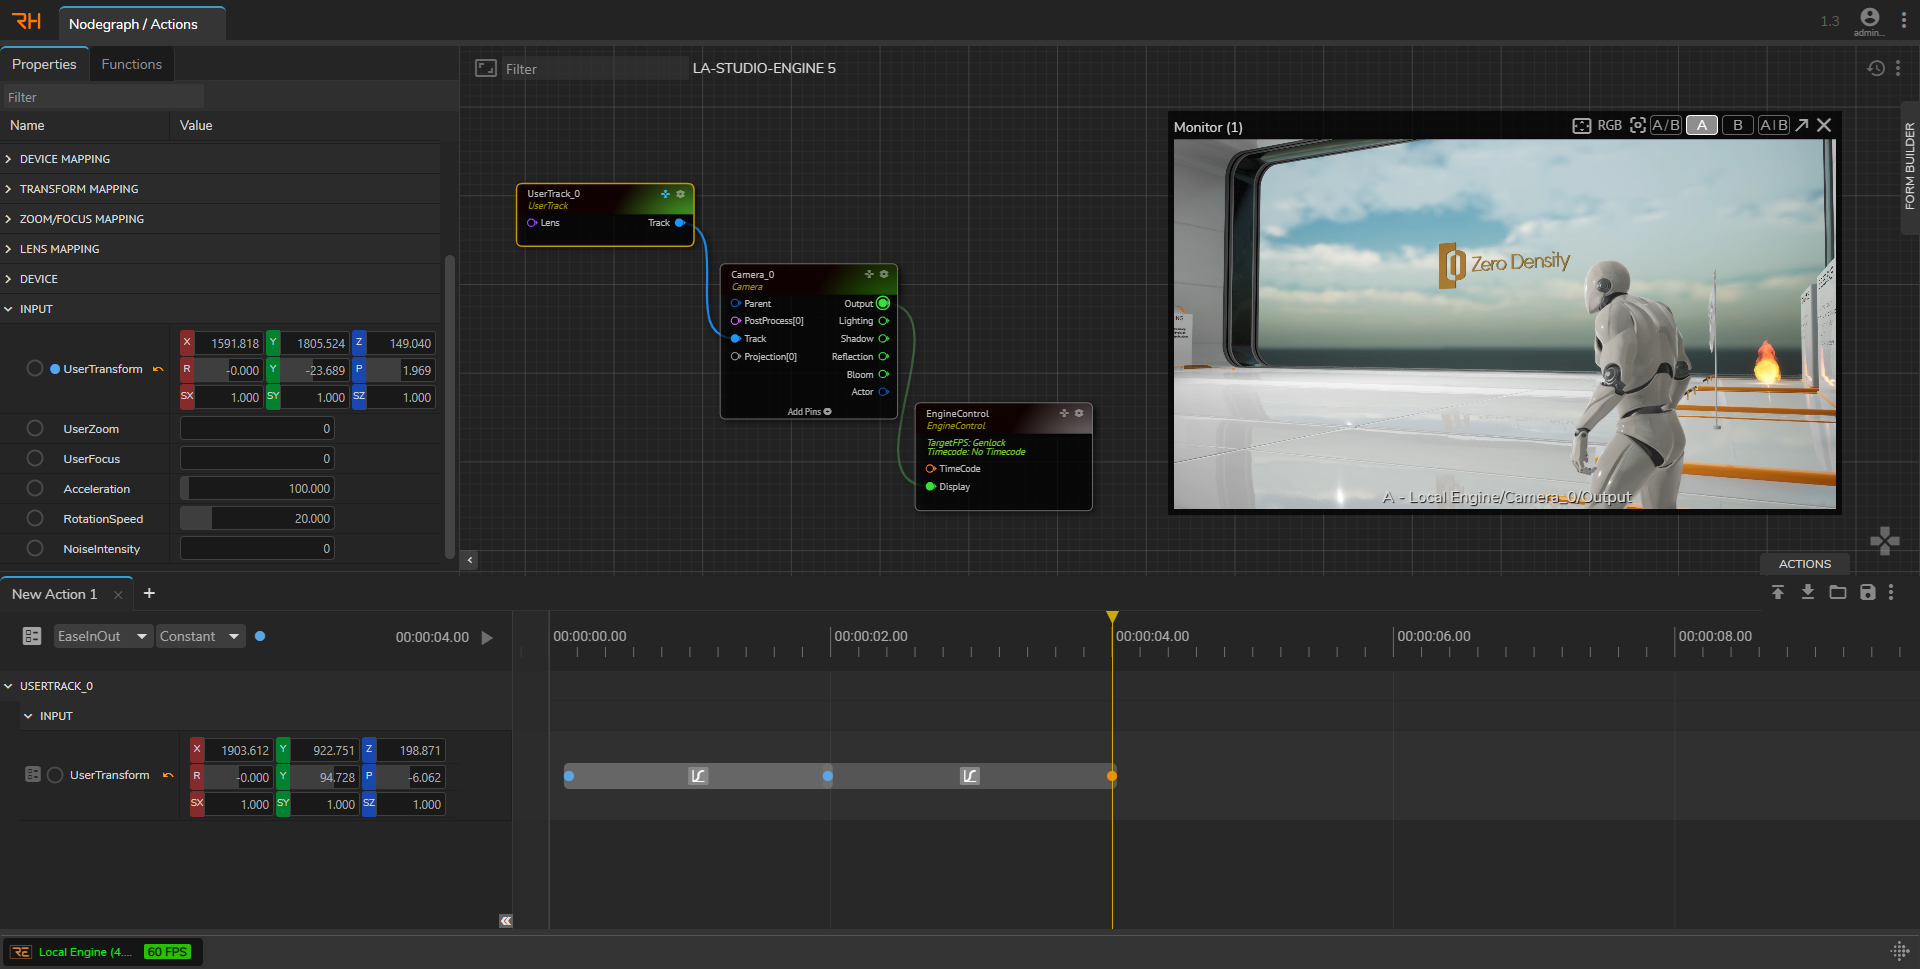
Now:
- Click on the
Actionsbutton and open the Action Panel; click on theNew Actionbutton. - Go to the
Cameranode’sOutputpin, right-click and assign the Monitor - 1 to Channel A - Select the
UserTracknode from the Nodegraph, go to the Properties panel, and find theUserTransformproperty under theInputproperty group - Left-click on the
UserTransformproperty’s menu circle, select the Timeline - Go to the first frame by moving the Timeline Slider handle
- Go to the
UserTransformproperty inside the Action panel left click and select Add Keyframe - Go to the 4th second, change the Y (Position) value to 500 and then change the Y (Yaw) value to -50
- Add another keyframe to the
UserTransform. - When your last keyframe is selected, go to the Keyframe Interpolation, select the EaseOut and click
Play.
