Exporting Custom Events in UMG to Reality API
Reality API allows you to use directly your custom events are created in Widget Blueprint. Your defined events appears functions tab of UMGRENDERERCOMPONENET
Creating Widget Blueprint
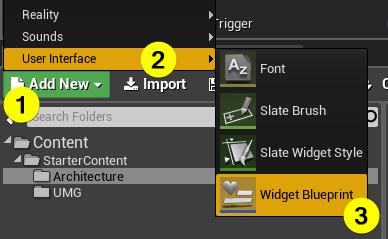
- First of all, create a widget blueprint. Use ADD NEW button which is at the top left corner of the content browser window or access it via right-click an empty area of the content browser and choose it from the component menu.
Changing the Parent Class of Widget Blueprint
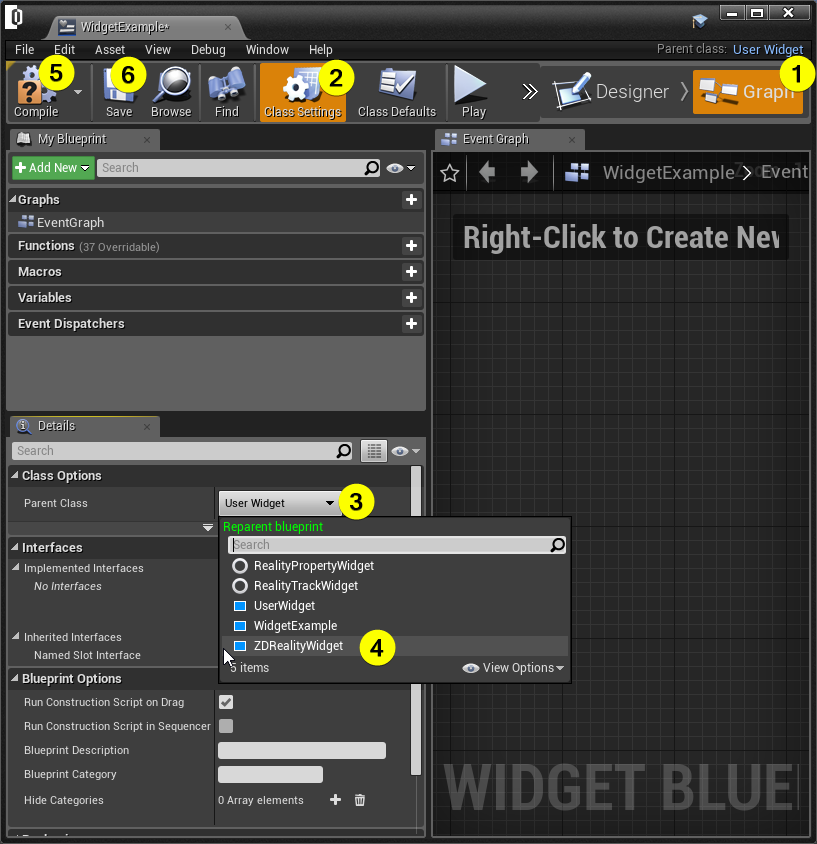
- Open the "Graph" panel of widget blueprint.
- Open "Class Settings".
- Check the details panel.
- Change parent class which is at under class options as ZDRealityWidget.
Adding Components
In this tutorial we will add a custom event and change a value of a textbox.
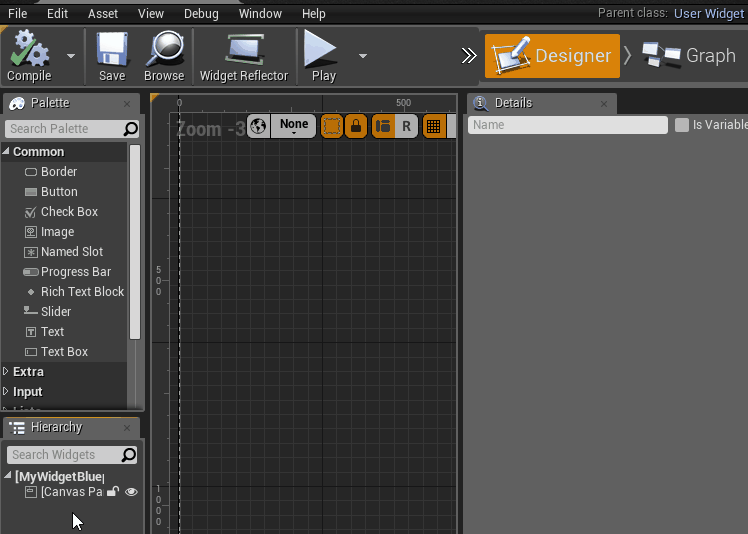
- Open Designer tab.
- Add a text component from palette under "Common" section.
- Check "Is Variable" box next to the text from details panel of the text component. (You can change other properties of text such as font size etc.)
Coding of Example
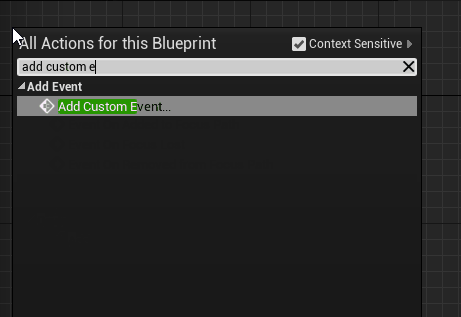
- Add a custom event. Right click and write "add custom event"
- Get reference from text variable under "Variables" section.
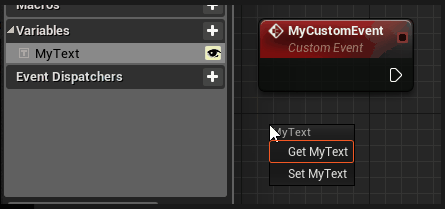
- Add set text node for "MyText" variable and connect nodes as shown in the below image.

Exporting Custom Events
- Open Class Defaults.

- In the details panel there is Reality section. Add a new elements to "Reality Events".
warning
If you can't see the Reality Section you should check your Parent Class of Widget Blueprint. It must be "ZDWidgetReality".

info
As you can see the array element name and Custom event name is the same. If they do not match we won't see our custom event.
Exporting Widget Blueprint
- Close the widget blueprint then open project settings from EDIT and PROJECT SETTING
- Open Exports tab which under Reality Title.
- Add an element to array in UMG tab under the widget classes. Set the Export Name, and set widget class as which you create before.
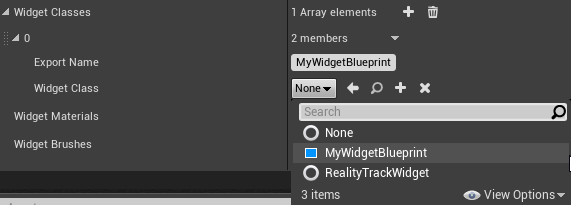
Using UMG in Reality API
- Click the PLAY button of Reality Editor then connect to Reality Setup. Open the Reality Setup.
- Right click CREATE → UMG → UMGRENDERER
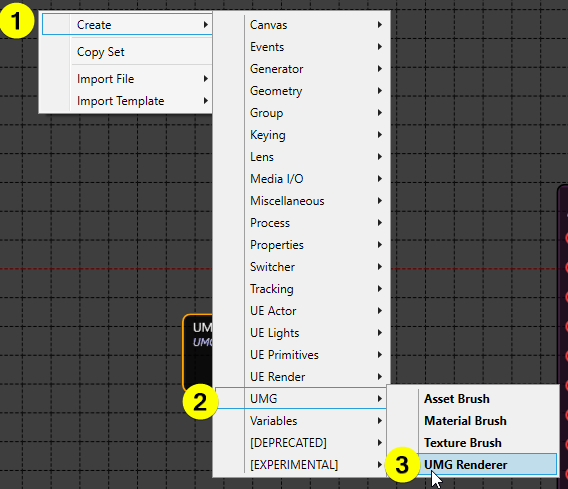
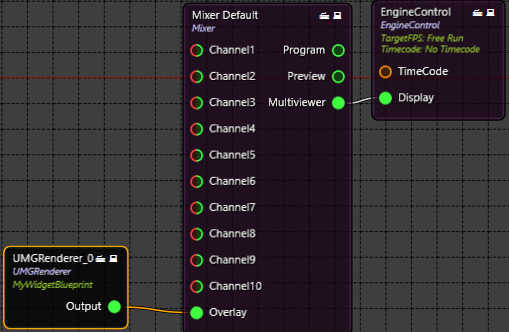
- Now there is an UMGRENDERER component. Let's connect OUTPUT of UMGRENDERER to OVERLAY input of the MIXER node as shown in the below image:
- Just choose the UMGRENDERER and check properties which is at left of Reality Setup.
- Change the widget class as "MyWidgetBlueprint".
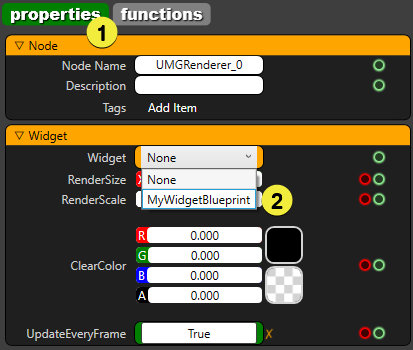
- Link nodes as shown in the below image.
Result
First, check custom event under functions tab of UMGRENDERER component.
Let's check the result.
