UMG Animations
Creating Widget Blueprint
Use ADD NEW button which is at top left corner of content browser window
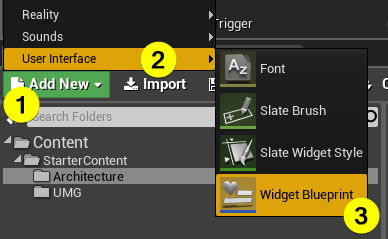
- Rename it and don't forget change the parent class of widget blueprint as ZDRealityWidget. Check the tutorial about How to Use UMG with Reality
Preparing of Components
Start to design scene. Add some components to canvas panel. Let's start to create an UMG animation.
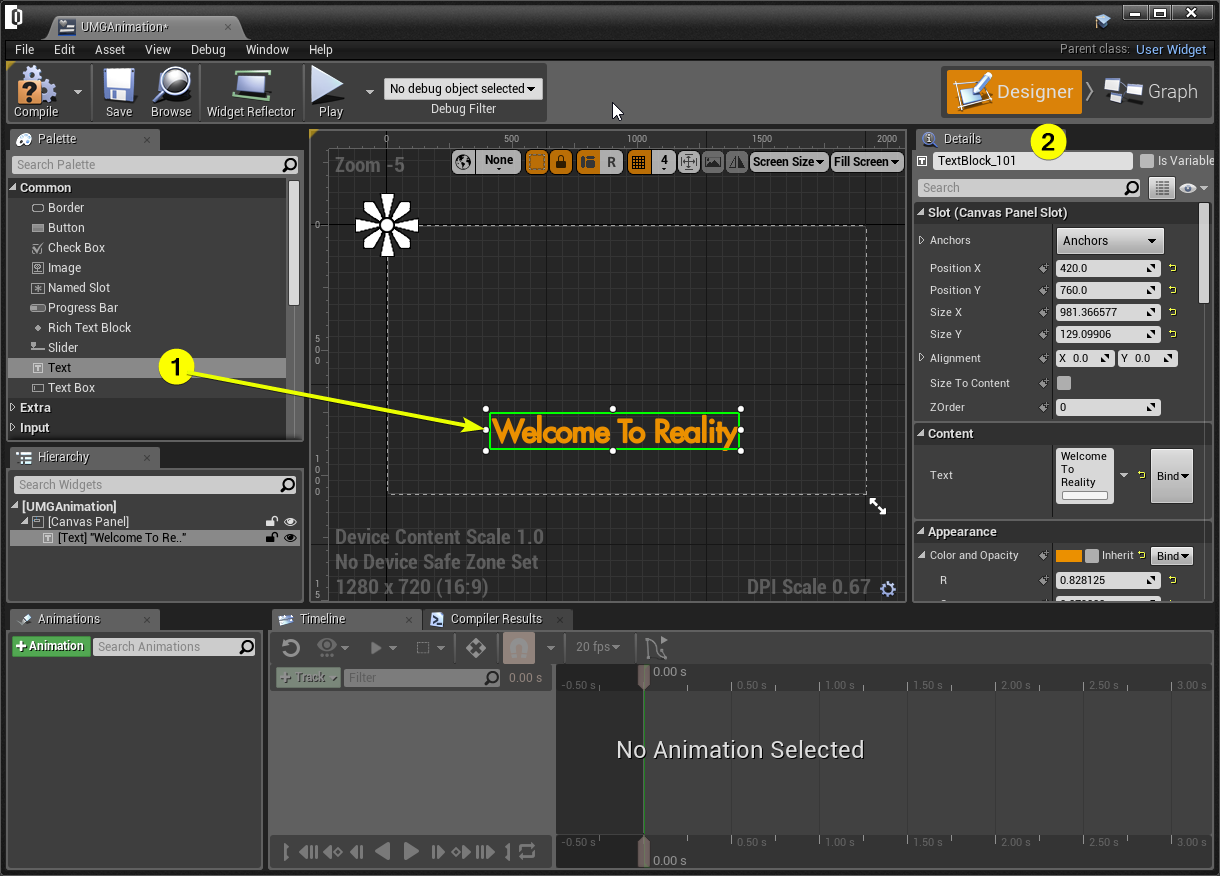
- Open the widget blueprint.
- Choose the text component from palette. Drag and drop it to scene.
- Customize it from details panel. (Change color, change font size etc.)
Adding Animation
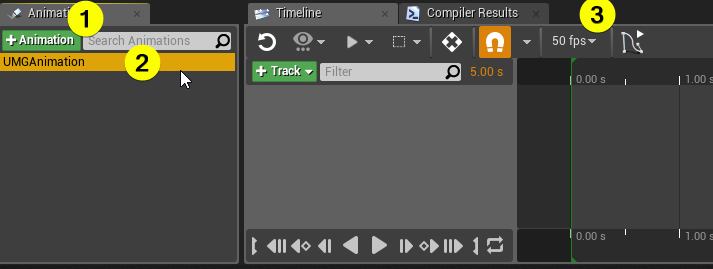
- Click the ANIMATION button to add new animation.
- Give a name to animation then save it.
- Choose your fps (such as PAL or NTSC) settings.
Adding Track to Animation
- Select the animation from animations tab which is at right bottom corner of Reality Editor.
- Timeline should be active to use it.
- Select the text component which is created before. (If we don't select it the text component can't appear in track menu.)
- Add text component to track menu.
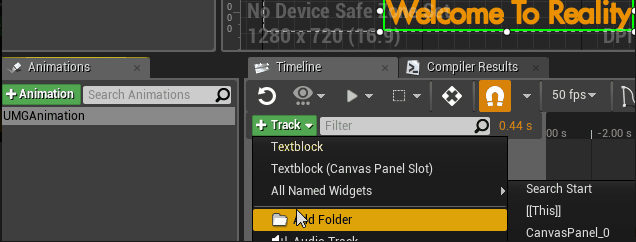
Adding Key to Track
- Select "Textblock(Canvas Panel as Slot)" from track menu, click the “+Track” which is next to the “CanvasPanelSlot_12”. (In your widget blueprint should be different. You can rename it also.)
- Select the Data.Offset.
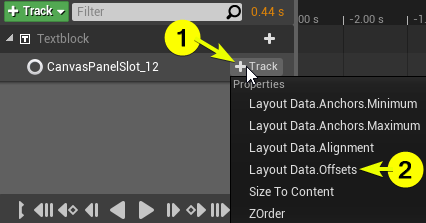
- There are a lot of property at track menu to manipulate it via keys. (We will use Data.Offset in this example. You could use another properties after understanding.) After the add Data. Offsets, some property should be appear under the tab.
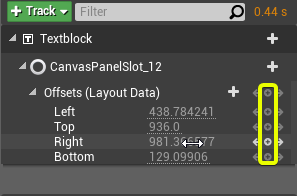
Those plus icons lets the users add keys to timeline. Let's create some animation via key in Timeline.
Adding Animation Key
- Make sure that the textblock is selected.
- Change the time as 0. There are two way to set time.
- One of them is via timebox which is at right of filter search bar. Click in it and change the time.

- Second one is with timeline stick. Drag it via mouse and drop it where you want set it.
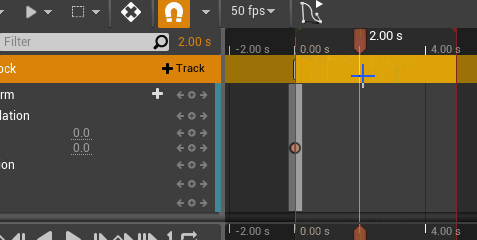
- Set the time.
- Click the plus icon to add new key.
- Set the property value of top. (You could change another value of properties also.)
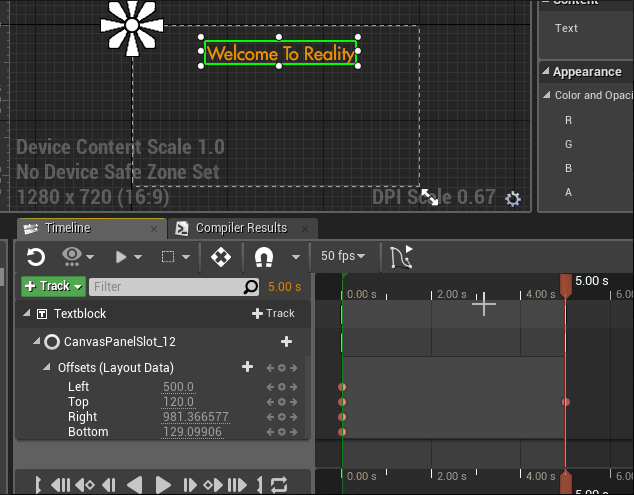
The animation is ready.
info
After these steps there is no any requirement except export to Reality Setup. You don't need prepare any blueprint script etc. (Reality shows all your animations as a node function.)
Exporting to Reality
- Close your widget blueprint then open project settings from EDIT → PROJECT SETTINGS
- Open Exports tab which is under Reality title.
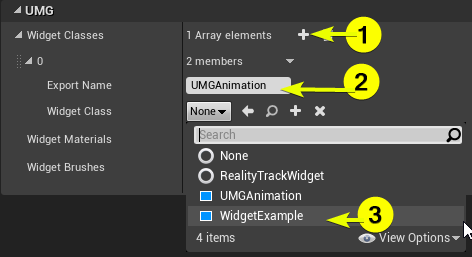
- Add an element to array in UMG tab under the widget classes. Set the Export Name, and set widget class as which is created before.
Using UMG Animations in Reality
Let's use the animation in Reality Setup.
- Click to PLAY button.
- Open Reality Setup.
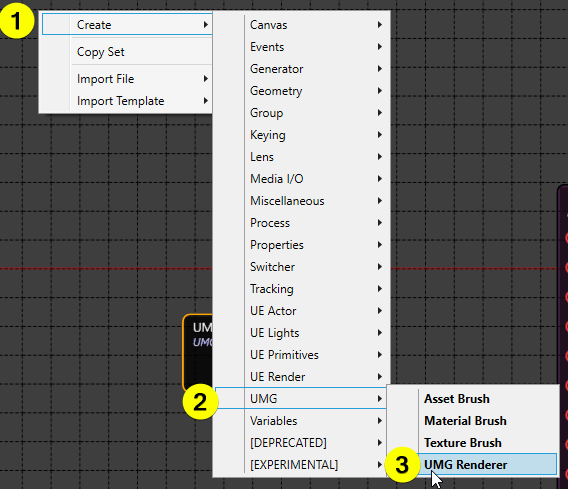
- Right click an empty area then go to CREATE → UMG → UMG RENDERER
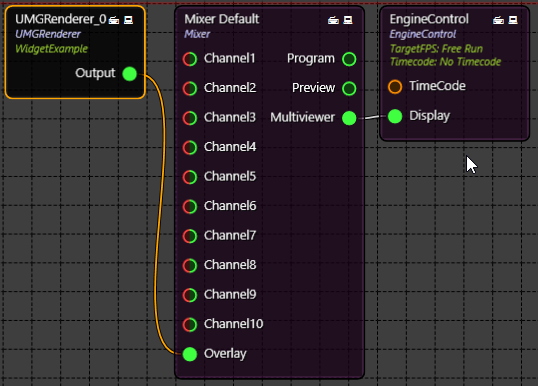
- Connect the OUTPUT pin of the UMG RENDERER to OVERLAY input of the MIXER node
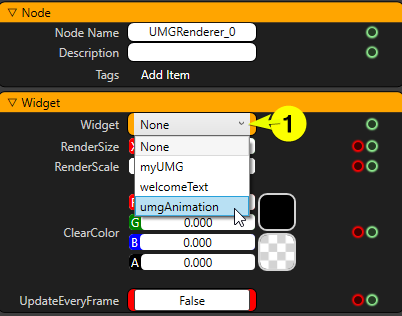
- Check the properties of UMG RENDERER
- Go to the WIDGET property group and change the WIDGET property to “umgAnimation”
- Open the functions
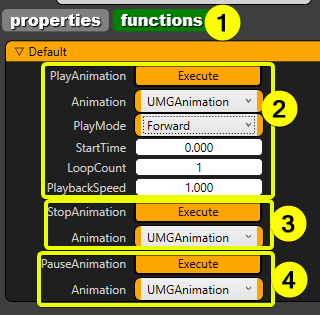
Let's explain these properties:
- Click on the functions tab of the UMG RENDERER
- This section allows the users to prepare some properties before play animation.
- This is for stopping the selected animation.
- This is for pausing the selected animation.
Let's click the PlayAnimation EXECUTE button and check the result of the MIXER DEFAULT node's PROGRAM output.
