Exporting UE Actor to ZD API (a.k.a ZDActor)
In this tutorial, we will reflect our Actor object to the Reality Setup. An Actor is any object that can be placed into a level. Actors are a generic Class that supports 3D transformations such as translation, rotation, and scale. Actors can be spawned and can be destroyed. You can add specific actor components like Particle Component, Billboard Component, or Scene Component. The ZD Actor Component exposes an actor node object into Reality Setup.
This tutorial aims to cover the following topics:
- Understanding Blueprint Actor Class and Actor Components.
- Understanding ZD Actor Component
- Exposing actor into Reality Hub
Getting started
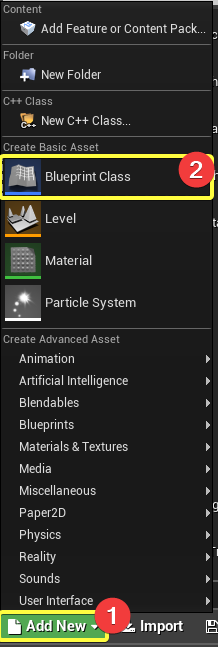
- Click ADD NEW and BLUEPRINT CLASS from the Content Browser tab.
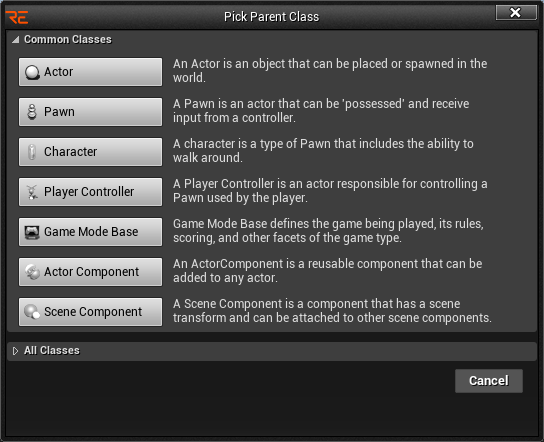
- Click ACTOR
- Rename it as MyActor. Double click on MyObject. The actor graph will be appear. (You can hit F2 key for rename after selection the object.)

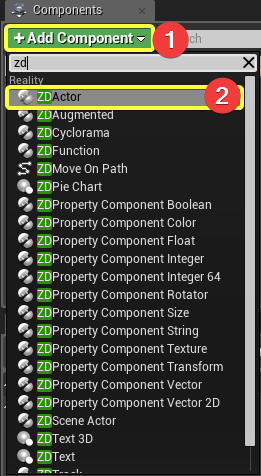
- From Components tab on left side, Click ADD COMPONENT + Search for "ZD" and click ZD ACTOR
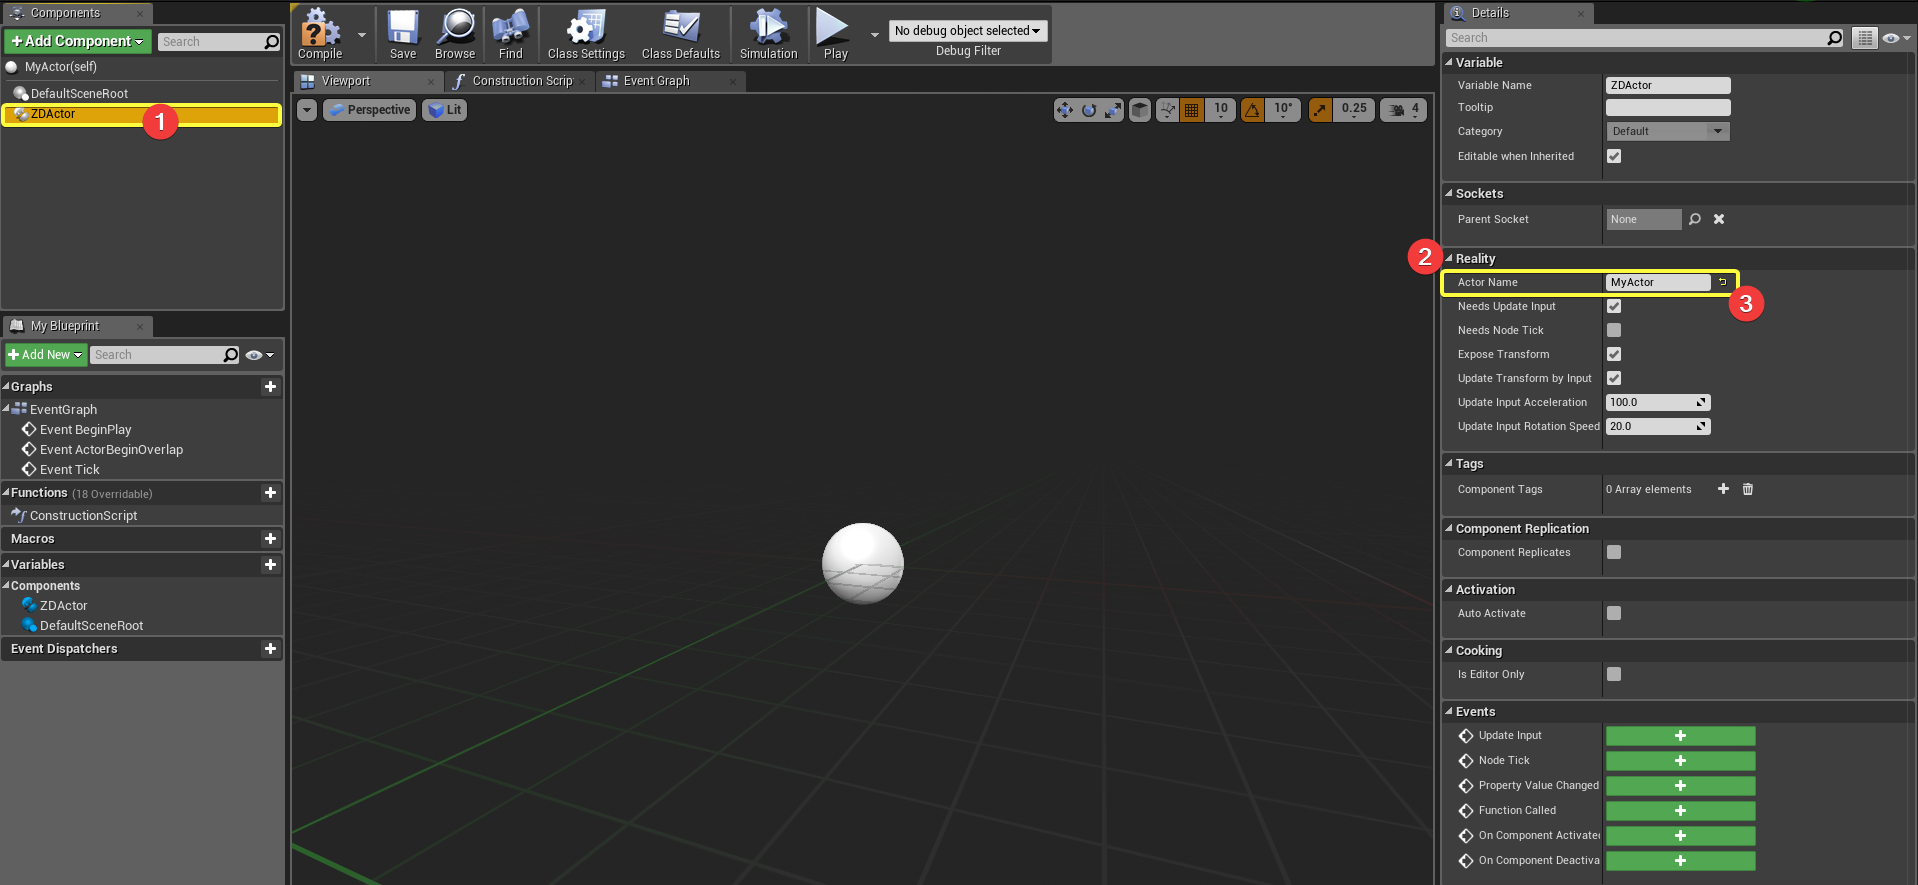
- Select the ZD ACTOR from the Components menu on the left side. Subsequently, the details panel(on the right side will appear). Under the reality category change Actor Name as MyActor.
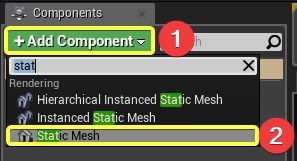
- Click on the ADD COMPONENET in the Components tab, find and select the Static Mesh.
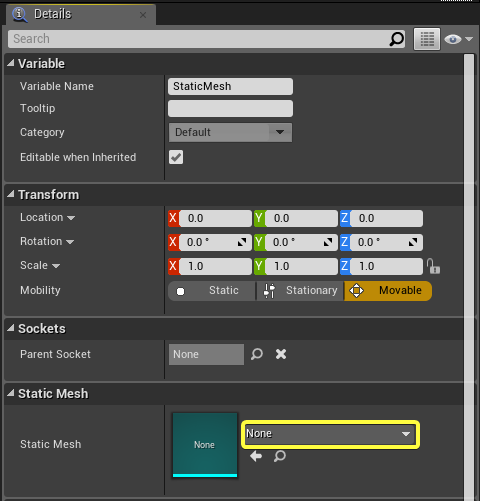
- Select the Static Mesh from the Components tab. Click the Static Mesh label from the details panel.
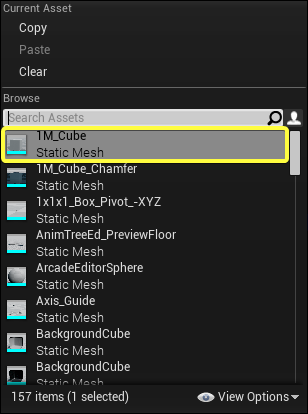
- Select 1M_Cube as static mesh**.**
- Click on COMPILE and then the SAVE. Close the actor tab.

- Drag MyActor from Content Browser to the Level.
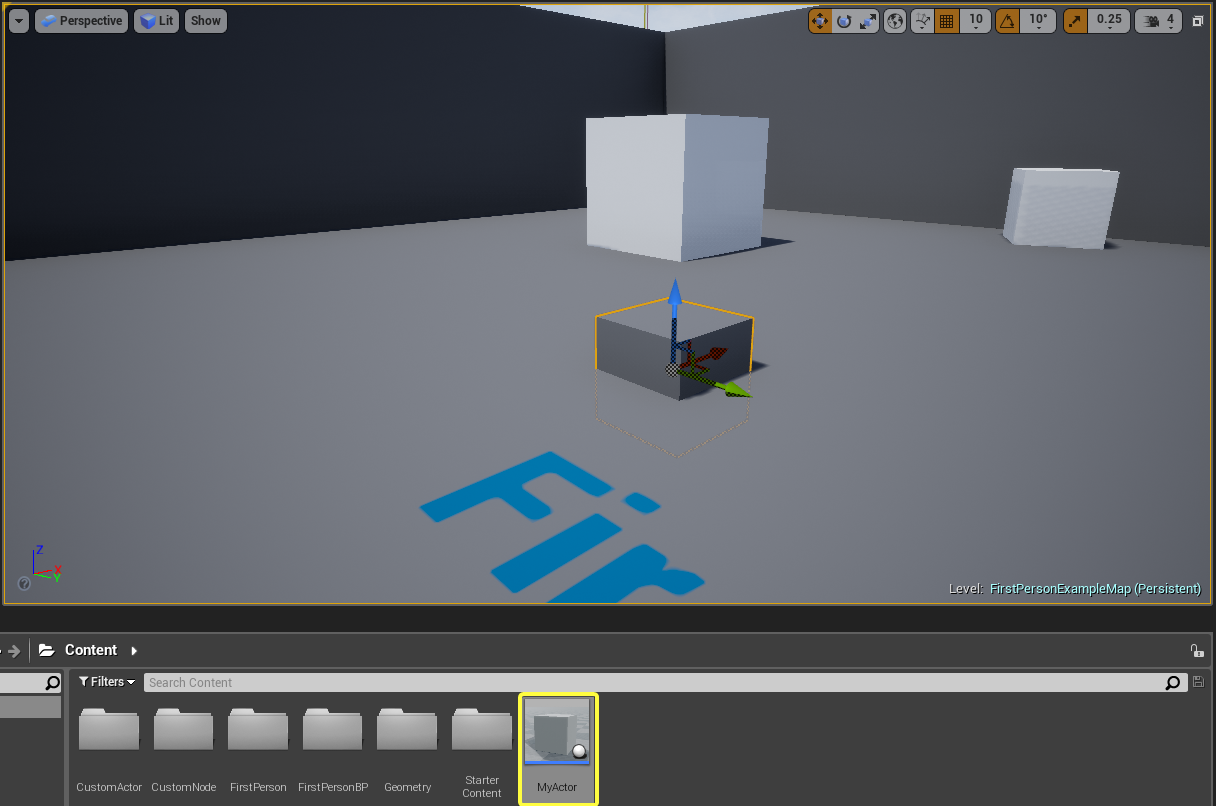
- Launch Reality Setup if you do not. Click PLAY button on top menu.

- The MyActor actor reference node automatically will be appear.
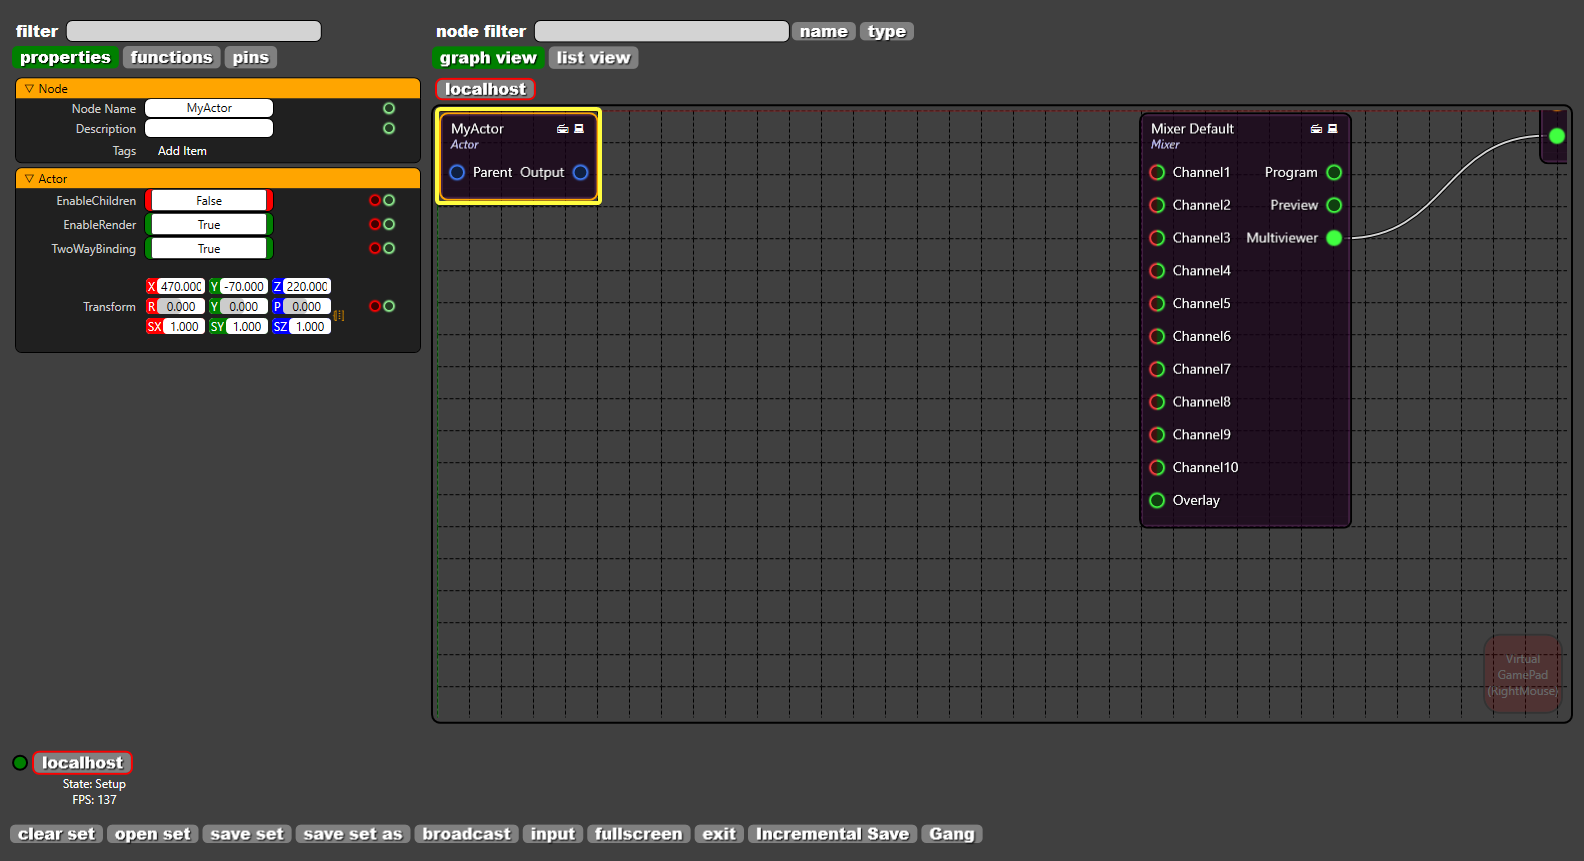
Conclusion
We exposed our blueprint actor object into the Reality Setup. We added ZD ACTOR component into our actor. Also we added Statc Mesh Component to see our actor to see as well. The node reference will be automatically created when pressed PLAY button on top menu. Also the node will be automatically deleted.