Using Event Tick Functions and Properties
Zero Density Blueprint Node object provides node-based pin I/O system for "Reality Setup" in real-time. Only specified pin data types can be exported into Reality Setup. You cannot place your object instance into level, because ZD Blueprint Node Class is not an actor. In this tutorial, we will instantiate a new Blueprint Node object and expose it on Reality Setup. This tutorial is aiming to understand properties and using Event Tick nodes.
This tutorial aims to show the following topics.
- How to instantiate Object and setup environment
- Usability of ZD Blueprint Node member functions.
- Using ZD Blueprint node on reality setup.
Getting Started with Properties and Functions
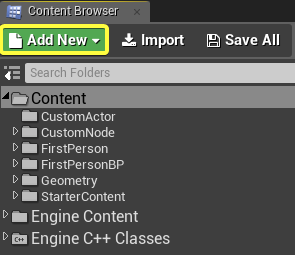
- Click On ADD NEW button on the Content Browser tab.
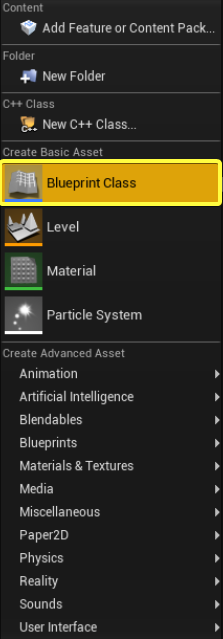
- Click on BLUEPRINT CLASS from menu.
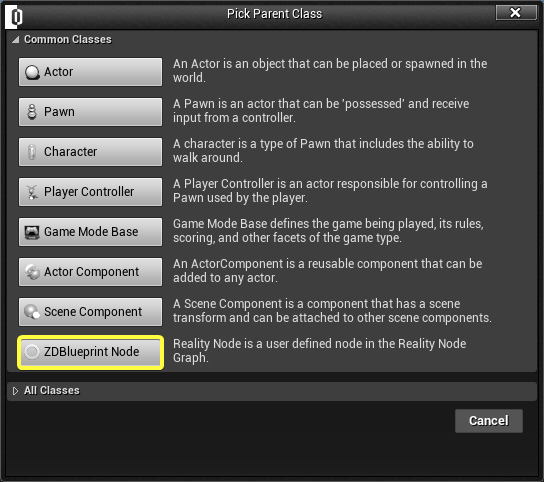
- Click on ZD BLUEPRINT NODE
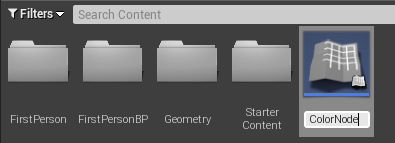
- Rename it as ColorNode, press enter and double click to open it. (You can also hit F2 key rename after select on.)
- After double click on ColorNode, the Blueprint Event-graph will appear.
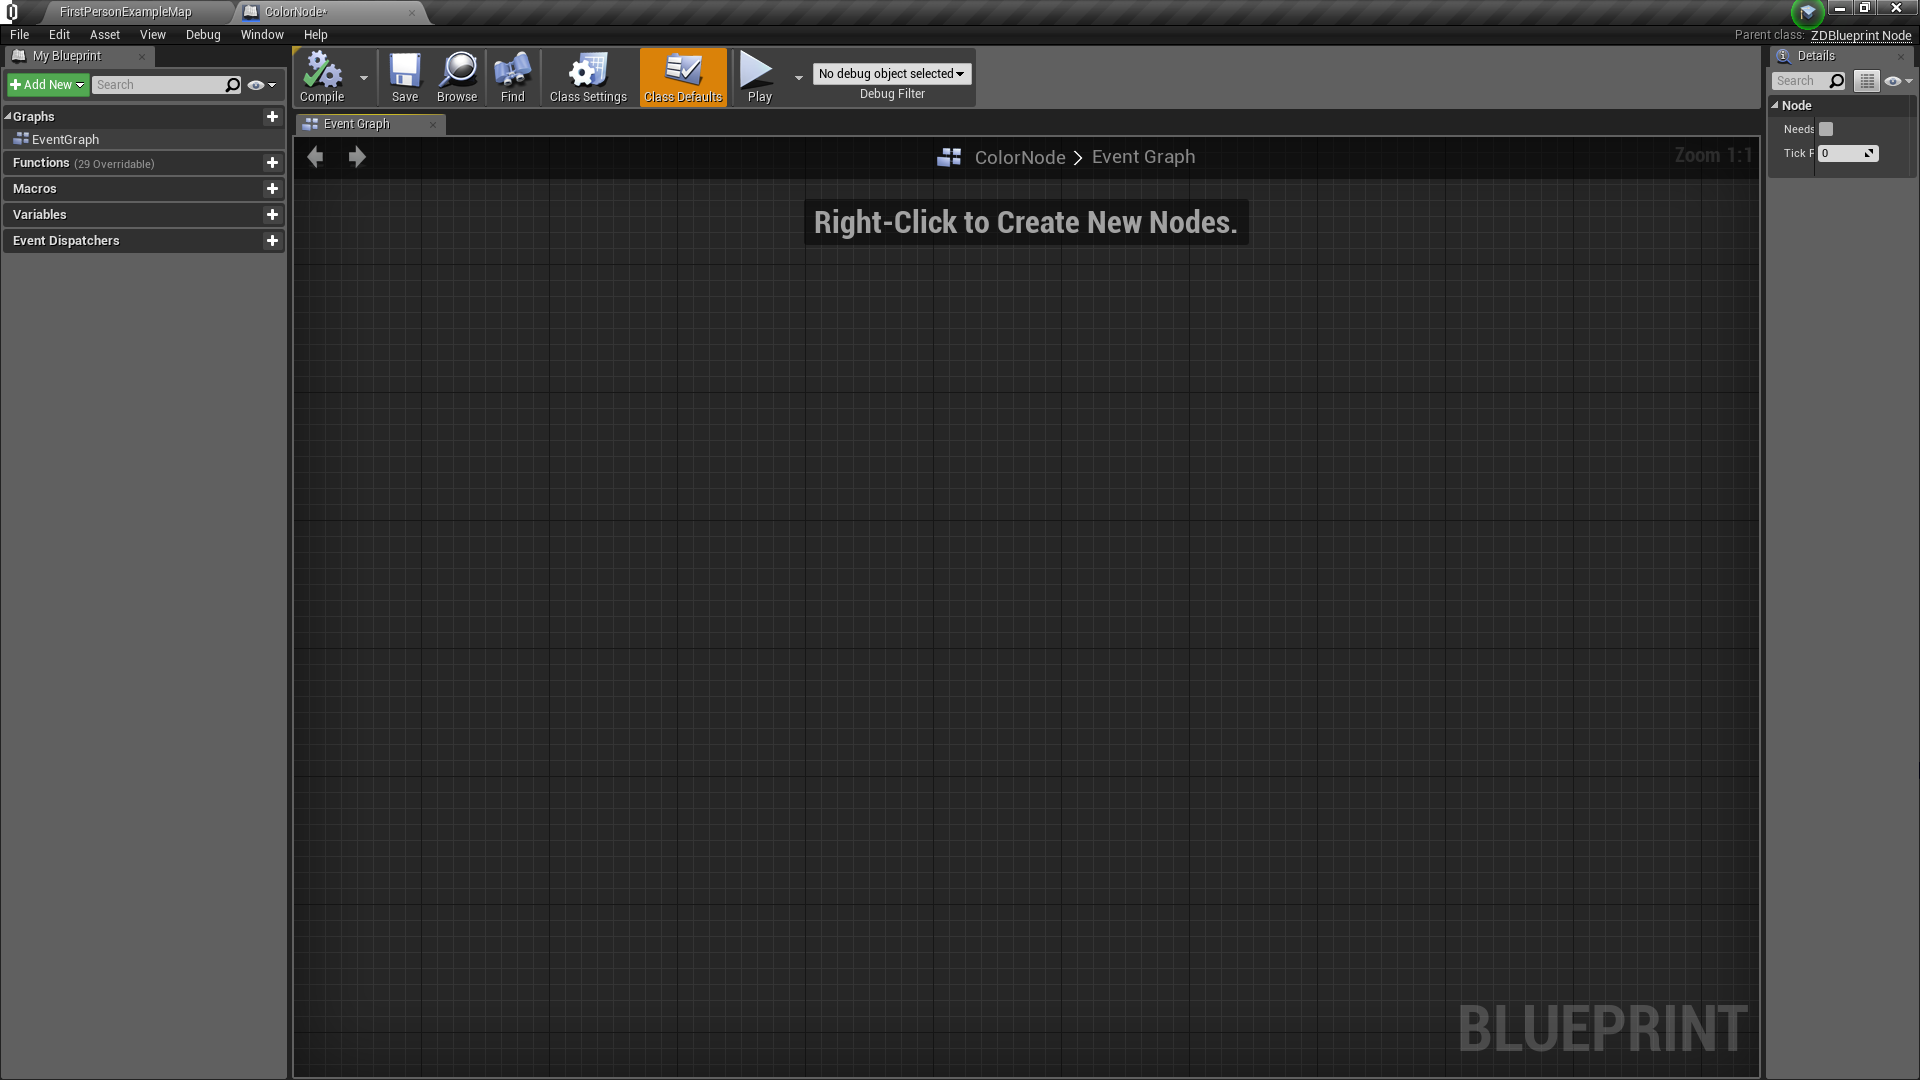
- Click on +ADD NEW and VARIABLE
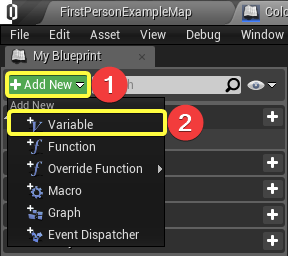
- Rename it as ColorStruct and press Enter.
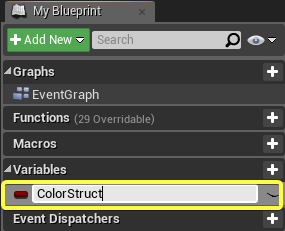
- Click on ColorStruct under the Variables section.
- Click on BOOLEAN near to Variable Type on Details Panel. (Details tab is on right side.)
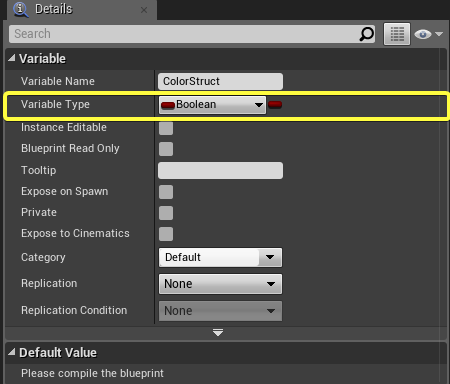
- Search it for "linear" word and select on Linear Color.
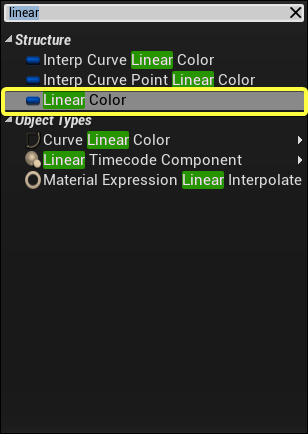
- Click COMPILE and SAVE from top menu.

From now on, we created a new ZD Node Blueprint class object and renamed it as ColorNode. We created a new variable named ad ColorStruct. Changing variable type to “Linear Struct”. We prepared our objects and variables. From there, we need to set event nodes and execute pins. We are ready to expand our node blueprint.
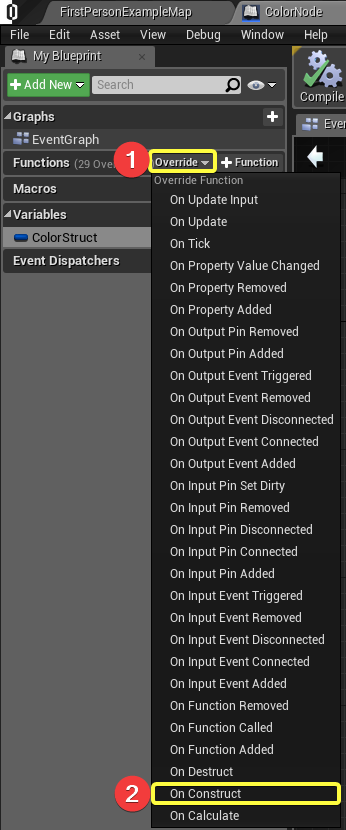
- On left panel, move your cursor on functions. Override button will be appear. Click override and click ON CONSTRUCT. The on construct will be created.
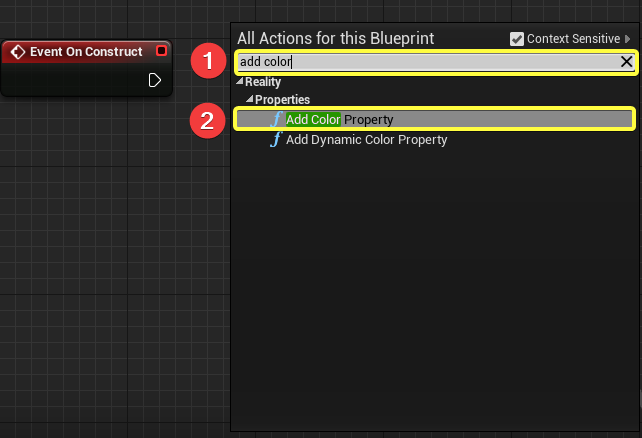
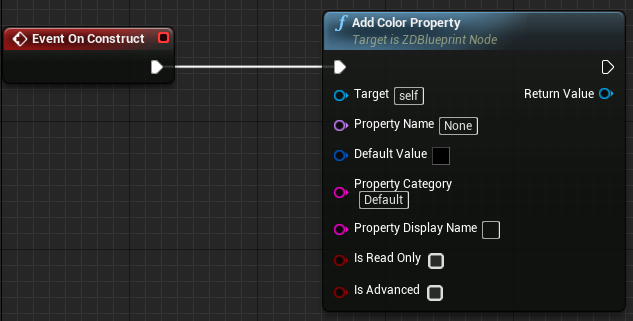
- Right click on the space area on event-graph. Search for "add color" and Click ADD COLOR PROPERTY
- Drag and place the execution pins(white ones) as shown in below:
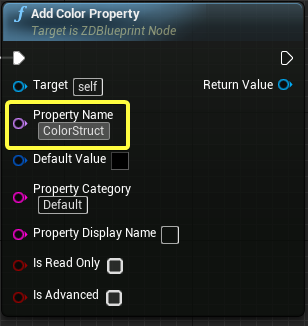
- Change Property Name to ColorStruct on the ADD COLOR PROPERTY function.
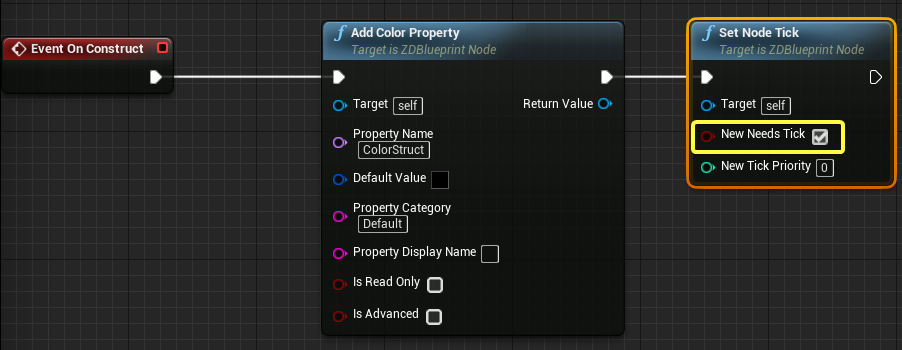
- Right click on the space and search for Set Node Tick and connect the nodes. Afterwards, check New Needs Tick on SET NODE TICK
- Drag and Drop ColorStruct from variables section to the event-graph space. Select Set ColorStruct. (As alternatively, hold ALT key and drag ColorStruct to the space.)

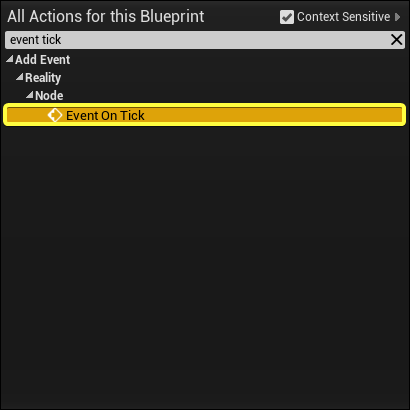
- Right click into space. Search for "event tick" and click Event On Tick.
- Right click on space, search for nodes and connect the pins shown as in below. You can search for `Set ColorStruct` for assigning a value into ColorStruct. Do not forget to set Random Float in Range Max pin to 255. Do not forget to set the Property Name as ColorStruct.
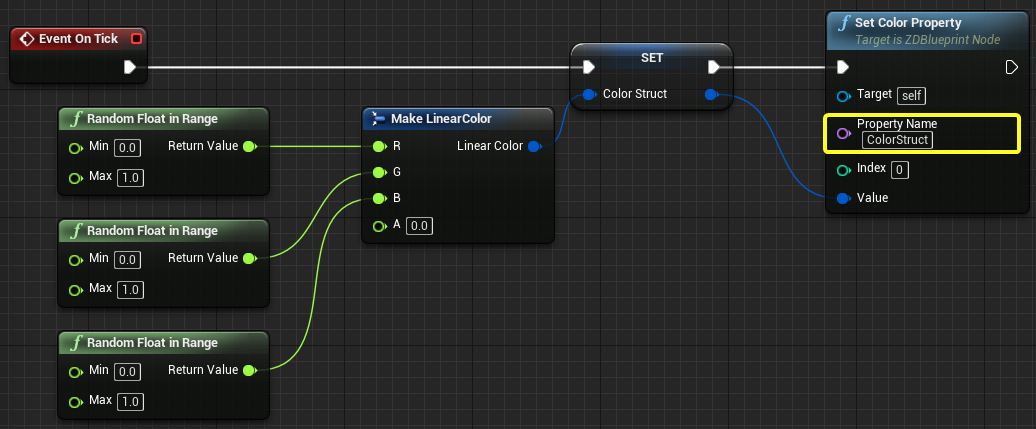
- The full of blueprint looks like this. Nodes could be set up on different locations. Click COMPILE and SAVE. Check if the blueprint is correct. Close the ColorNode blueprint.
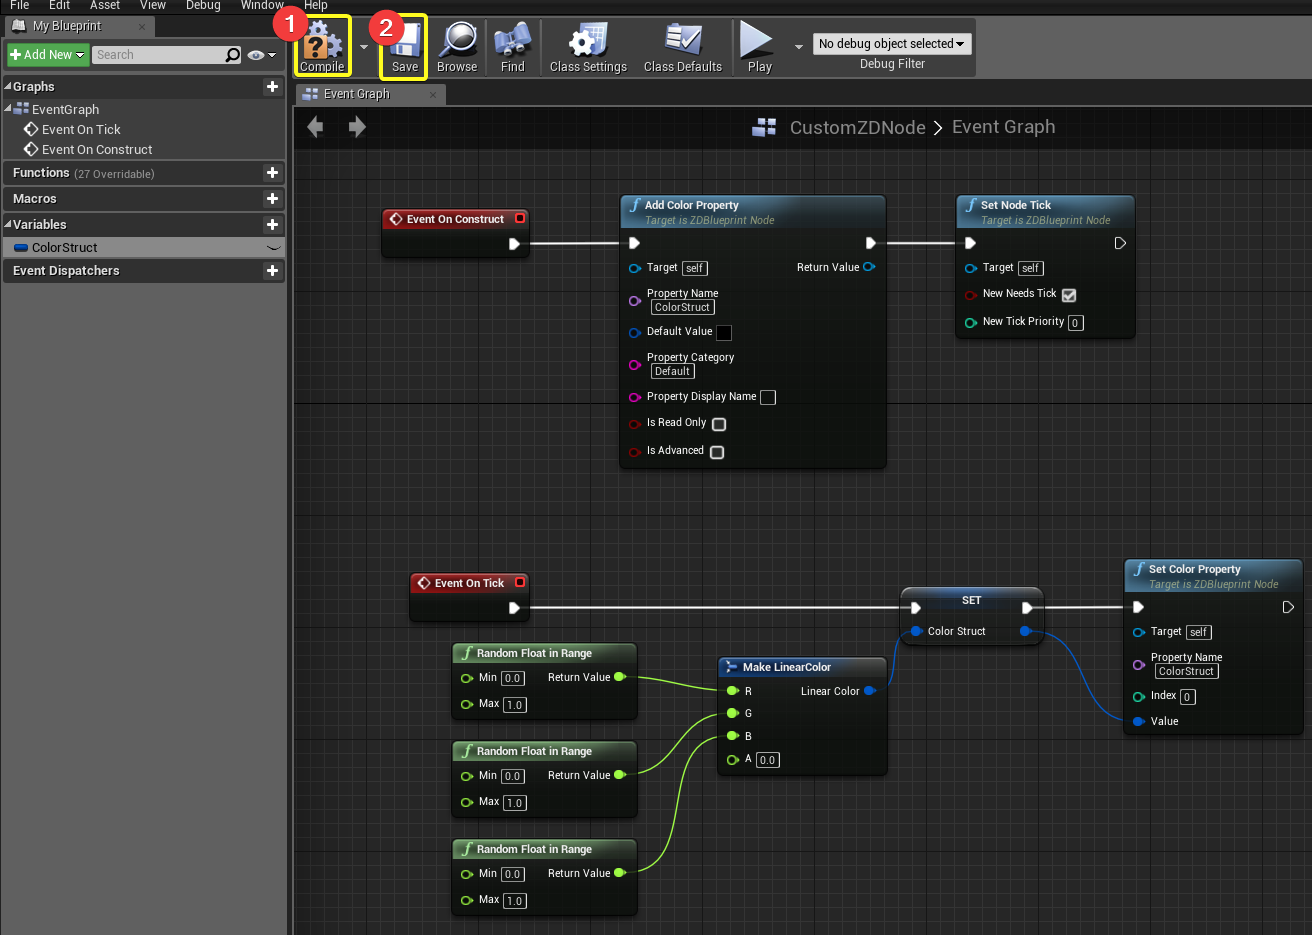
As so far, We finished the functionally part of blueprint. We used ADD COLOR PROPERTY, SET COLOR PROPERTY and SET NODE TICK to modify our blueprint node. You can look at Blueprint Node Reference for furthermore functions. We set random RGB colors for every tick(frame change). The components of ColorStruct will be changed for every frame change and our node will be updated.
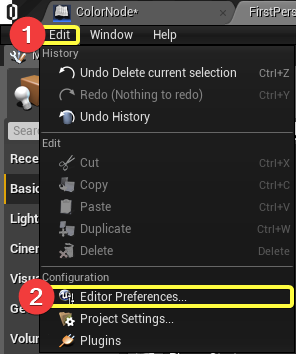
- Click EDIT and EDITOR PREFERENCES from top menu.
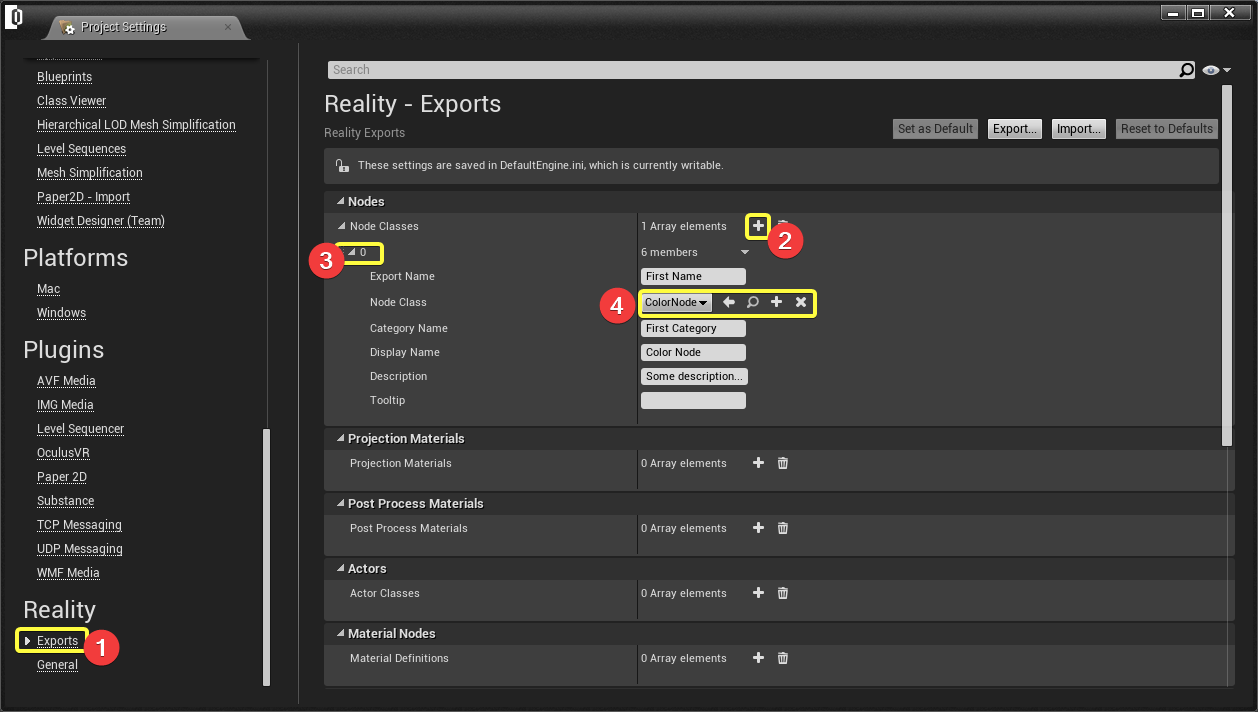
- Scroll down, Click EXPORT under REALITY category. Follow the steps. Click + button for a new NodeClass. Click 0 to expand. Click Node Class and select ColorNode. You can fill other areas. Close Project Settings.
- Launch Reality Setup application. After launched, click play on top menu from Reality Editor.

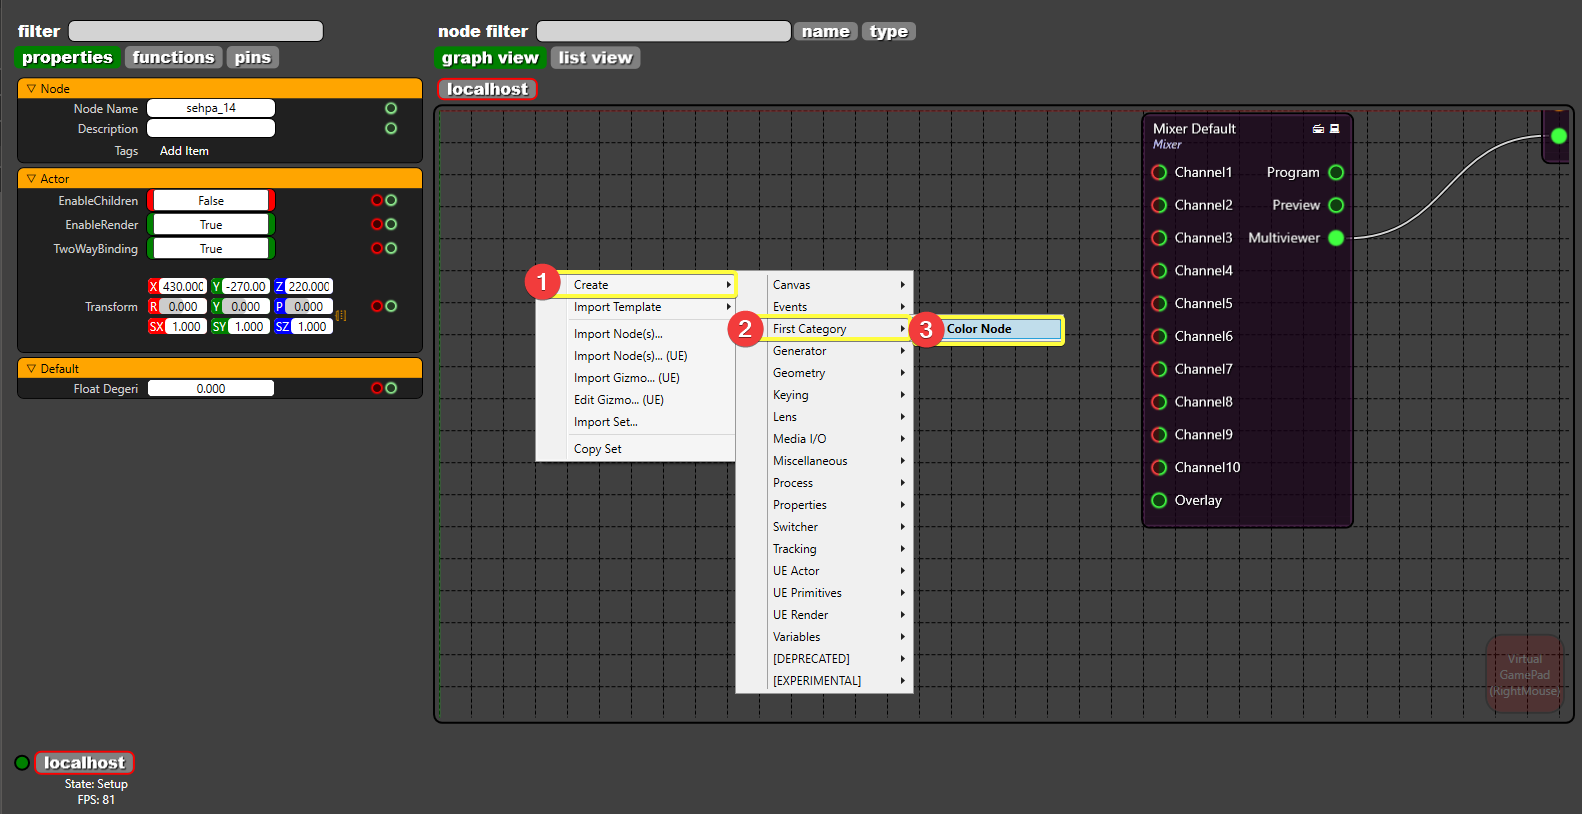
- While Run Reality Setup. Right click on space. Click Create, click category named as "First Category". Click to Color Node.
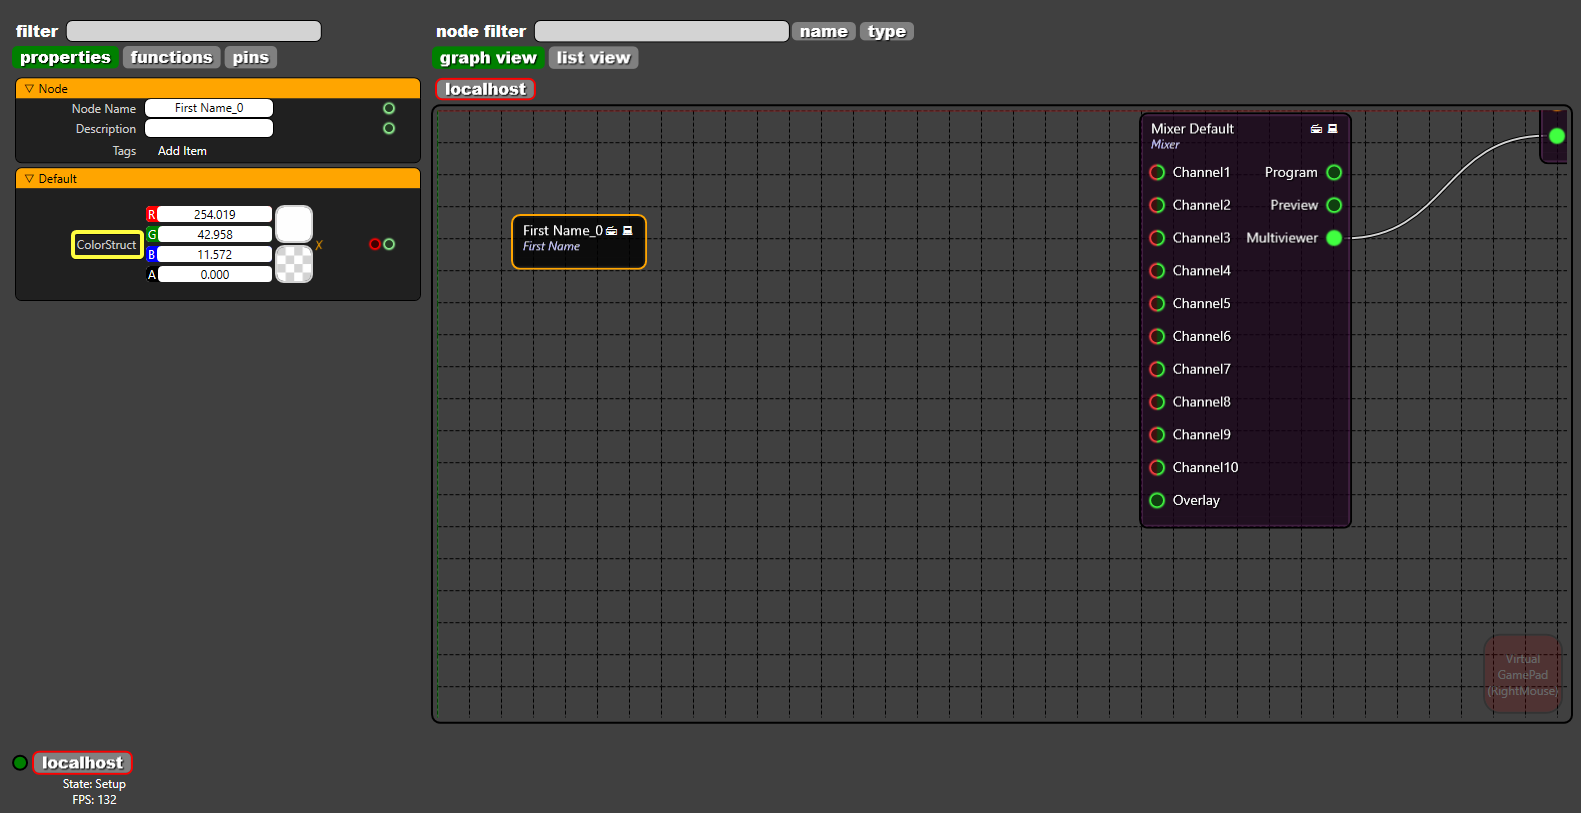
- Click on First Node and watch the ColorStruct values.
Conclusion
We learned how the create ZD Blueprint Node Class with using Unreal Engine Blueprints. We added blueprint variable into our node for create Color Property. You can modify your Input/Output pins with creating nodes. You also can to add Input/Output pins with using ADD INPUT PIN or ADD OUTPUT PIN to server data.